Cooking

Nov 20, 2017 | Post by: Meghan No Comments

DIY No-Sew Apron

Staying clean while cooking is so much easier when you can toss on this cute and functional no-sew tea towel apron!

When it comes to cooking I always make a huge mess.  Even when I try my hardest to be clean and neat as I mix and beat, I always seem to fail. I’ve even started changing my clothes when I cook because I know myself Echtgeld Casino : Besten 18 Echtgeld Casinos für deutsche Spieler, and I know I’ll get whatever I’m making on my clothing!

Changing into my “cooking clothes” was starting to become a pain; I didn’t want to change my clothes just to make some brownies! It was time to protect the clothes I was wearing, so I made a functional and cute apron out of a tea towel. What’s great about this project is it doesn’t require any sewing.  This DIY apron is perfect if you are hosting Thanksgiving this year.  It would also make a great hostess gift!  See how the full tutorial on diys.com.

Jun 04, 2017 | Post by: Meghan No Comments

DIY Father’s Day Barbecue Sauce Gift


With Mother’s Day over, it’s time to shift gears and focus on our dads. When it comes to making and giving handmade gifts, Mother’s Day is an easy one. There’s DIY paper flowers, vases, pretty cards, stenciled tea towels, and the list goes on and on. When it comes to making gifts for dads, it can be a little difficult. For me, I always struggle with making something my dad will not only like, but will be able to use. Why is it so hard to create gifts for guys???

I really wanted to focus on making something special for my dad that wouldn’t just get put on a shelf to collect dust. I tried to think of my dad’s hobbies and interests so I could land on the perfect project. Food seemed to be the constant theme that kept coming to mind. Like most dads, my dad is a huge fan of grilling. He is definitely the grill master in my family. I knew I wanted my project to be around grilling, which hopefully meant it would be thoughtful AND functional!

I’ve seen wood burned grilling tools in the past and loved the idea. Instead of going with a monogram or simply putting ‘Dad’ on the handle, I wanted something a little different. I have no idea how this idea came to me, but when I was thinking about grilling and tools my mind came up with “Baste Dad”. Instead of ‘Best’ dad, ‘Baste’ took it’s place. Get it?! “Baste Dad!” I ended up making a paper apron to wrap around a mason jar filled with my dad’s favorite BBQ sauce (you could also make your own BBQ sauce if you wanted to take this project to the next level!). And that, my friends, is how I created a functional gift for my dear old dad this Father’s Day.

What will you be making for your dad this year?

HERE’S WHAT YOU’LL NEED:

Pinterest Pin

Spell out ‘Baste Dad’ on on your basting brush with your alpha stickers. Trace around your letters with your pencil. Then, outline your letters with your wood burner and fill them in.

Pinterest Pin

To create your mini apron, grab an extra piece of cardstock, that when folded in half is the same lengths as your mason jar (trim off any excess). I folded my paper in half and just drew a free hand apron. I started with a curved line coming down from the top of my paper. I then folded my paper in half and cut along my curve. This created two equal sides. Next, I grabbed my blue paper, folded it in half, placed my template on the crease, traced around it, and cut it out.

Pinterest Pin

To create a cute little pocket for your apron, cut a small rectangle. Fold it in half and place glue on the outside edges to close it. Then, add glue to the back and place it in the center of your apron. Add glue to the inside of your card and glue it to a piece of white cardstock. Cut around the edges, leaving about an 1/8 inch. Punch two holes at the top of your apron and two holes on the sides. Open your card and write your sentiment.

Pinterest Pin

Place the lid on top of your scrapbook paper, trace it, cut it out, and glue it to the top of your lid. Pour your BBQ sauce into your jar and close the lid. Cut a piece of twine that is about a yard long. Run it through the top two holes in your apron, wrap it around your lid, and tie a knot. Bring your two twine ends up through the two holes in the side of your apron, and wrap it back around your jar. Finally, add your baste brush and wrap the remaining twine around it and tie a bow in the front. At the last minute I decided to add a cute little yellow grilling mit. Once again, I just ended up free handing it! Enjoy!

Pinterest Pin

Pinterest Pin

Pinterest Pin

Pinterest Pin

(more…)

Jun 24, 2015 | Post by: Meghan No Comments

Kitchenaid Adventures: Peanut Butter Cookies

Happiness is creating: Kitchenaid Adventures

When Mike and I were engaged, we were super excited to register for some new home accessories, decor, and kitchen gadgets.  One of the items we was a KitchenAid Mixer.  Now, I was not a big baker, but I knew this was something you registered for. I felt like every “adult” kitchen had a KitchenAid Mixer in it.

Well, we were lucky and someone bought us our KitchenAid Mixer! After we got all of our shower and wedding gifts, we put them into storage.  Mike and I did not want to use our new goodies until we bought a house.  Well, two and a half years later, we bought a house and finally unpacked all of our wedding gifts!

I was so exited to place our KitchenAid Mixer on our countertop.  We were officially adults! Now, It still took me another 6 months before I actually used the darn thing! Like I said before, I am no baker!  I have used my KitchenAid Mixer twice.  Once to make Irish Soda Bread and another time to make a lamb cake for Easter (this was a huge success by the way!).

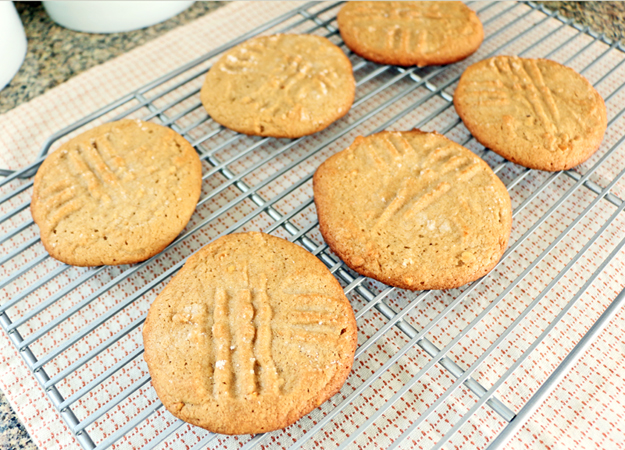
I was thinking, since I have my awesome KitchenAid Mixer (and I’m not so skilled in the baking department), I would challenge myself to start baking, so I started with some peanut butter cookies as a gift to my father-in-law for Father’s Day.  Peanut butter cookies are his favorite.  I was looking for a recipe for the best peanut butter cookies.  I found one that had a TON of positive reviews.  This peanut butter cookie recipe sounded amazing, so I decided to give it a try myself.

The recipe itself is SUPER simple.  It is made with the most basic ingredients. In an attempt to get fancy, I bought the Peanut Butter & Co. peanut butter.  I thought this would make my cookies taste much better.  Let’s just say, the White Chocolate Wonderful is pretty much out of this world, so the regular stuff had to be just as good.  I started by adding my peanut butter (and maybe eating a spoonful just to taste it’s yumminess). I followed with the remaining 5 ingredients that were to be mixed together. As I finished adding the final ingredient to the top of my cookie mound, I realized I had added freakin’ almond extract instead of vanilla extract. STORY.OF.MY.LIFE! Of course it had to be the LAST ingredient! Of course…

I grabbed the bowl off my KitchenAid Mixer and dumped the contents into the garbage. Defeat. I needed a quick drink before I stepped back into the baking arena. This was supposed to be simple, right?  Once I was calm and refocused, I began adding my ingredients back into the bowl (nothing like wasting half of a $5 jar of PB!). This go around was much quicker.

After all of my ingredients had been added, I let that puppy mix until my batter was nice and smooth.  I’m not sure if I was supposed to let it get that smooth (my assumption is, probably not since my batter was super sticky!).  I love that since I have no baking experience whatsoever, I am not judging how long cookie batter needs to mix!  However, my workaround was to throw my batter in the fridge for a few  minutes so it could solidify a bit before I rolled it into a ball.  That actually worked!

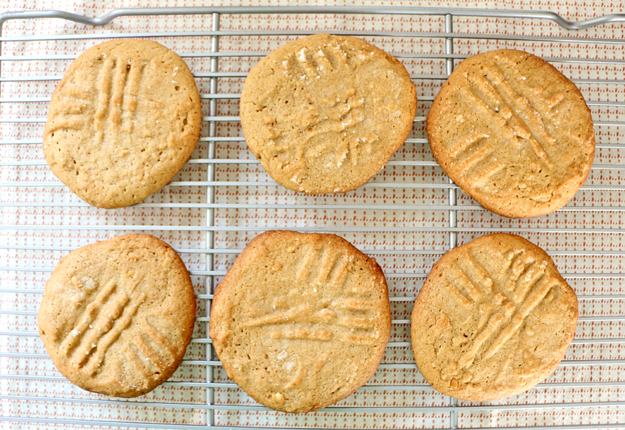
The final step of my PB cookie adventure was to push a fork into my dough, forming the signature cross marks we all know.  The recipe said you could dip your fork in flour or sugar.  My question is: “Who in their right mind would choose a flour option over sugar?” Not this girl!  Sugar won that showdown, obviously.

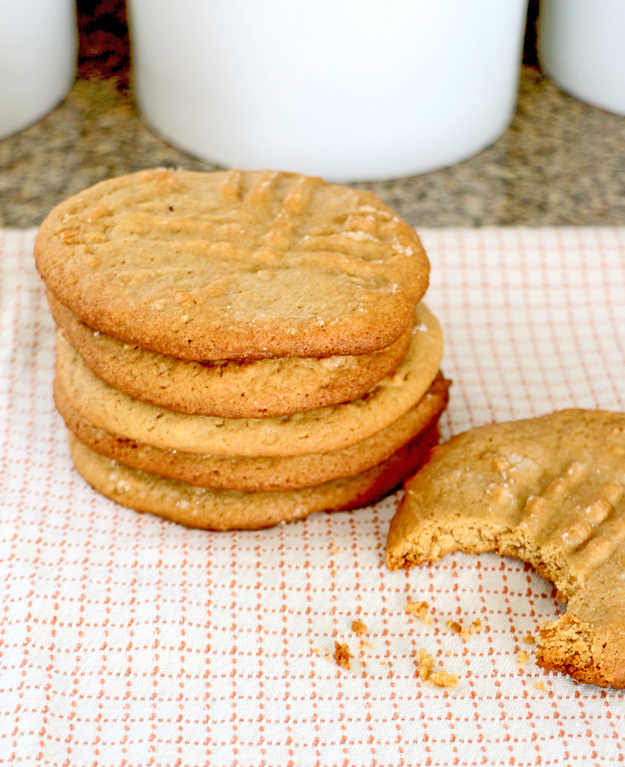
Even though my baking skills were not the strongest out of the gate, I redeemed myself.  My PB cookies were Damn good!  You MUST try this recipe.  It should be is super easy!  I’m not sure if the Peanut Butter & Co. peanut butter is what made the difference, or the that fact that I mixed my cookie dough into pancake batter, either way, you should follow my instructions exactly. :)

I made my cookie balls pretty large. My ADD was not going to sit there rolling out a million small cookies.

Happiness is creating: Best Peanut Butter CookiesHappiness is creating: Best Peanut Butter Cookies

Since these cookies where for Father’s Day, I placed them in a kraft treat box with some tissue paper.

Happiness is creating: Best Peanut Butter Cookies

I then wrapped some baker’s twine around the box so my father-in-law thought he was getting gourmet cookies.  It’s all in the presentation, people.

Happiness is creating: Best Peanut Butter Cookies

  • Follow on Bloglovin
  • Categories

  • Archives

  • Press

  • Recent Pins

    ...
    ...
    ...
    ...
    ...
    ...
    Stamping and weaving make this an engaging apple craft for preschoolers! Here you will find cute and simple apple crafts for kids, toddlers and preschoolers. #applecraft #fallcrafts #fallcraftsforkids #autumncrafts #preschoolcrafts #howweelearn...
    ...
    Fall paper lace...
    ...
    Apples in a box...
    ...
    ...
    ...
    ...