
I have to admit, it was quite difficult choosing one of my inspiration flats to CIY. They all had some serious character. I mean, they are like candy on you feet! I was at Vogue Fabrics and spied a black and white stripe print fabric. This pretty much made my decision for me. :)
Let me know if you decide to tackle this project and if so, how your bows for your toes turns out!
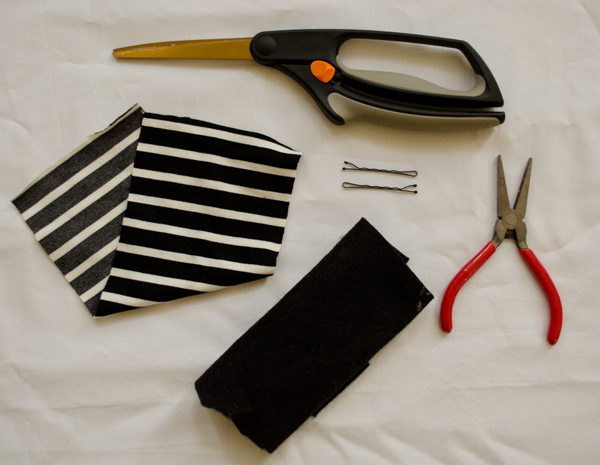
Supplies:
– 1/8 yard of stripe jersey fabric (I bought mine at Vogue Fabrics)
– Black felt
– 2 Black bobby pins
– Scissors
– Pliers
– Hot glue gun and glue
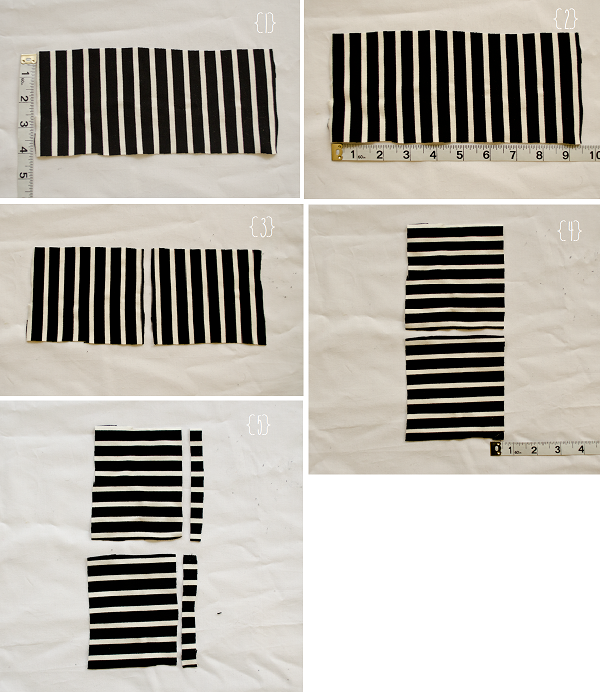
{Steps 1&2}: Cut your fabric so it is 4 inches long and 9.5 inches wide.
{Step 3}: Fold your strip of fabric in half and cut. Your two pieces of fabric will be the same size.
{Steps 4&5}: Measure a 1/2 inch from the side of your fabric and cut both pieces of fabric.
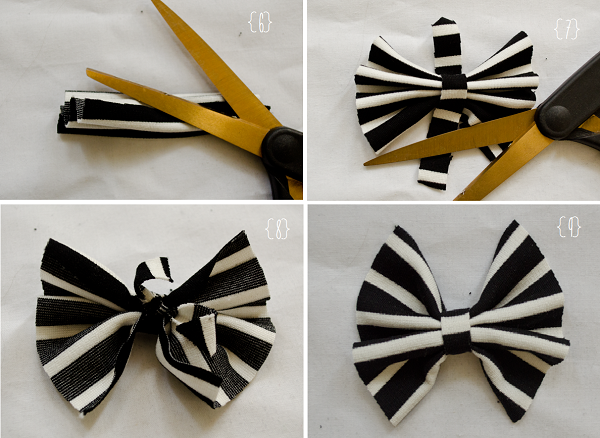
 {Steps 6 & 7}: Take your large piece of fabric and fold it like an accordion. You can find instructions here. Once your fabric is folded, pinch it together and grab one of your thin pieces of fabric and place it over the front of your larger piece of fabric.
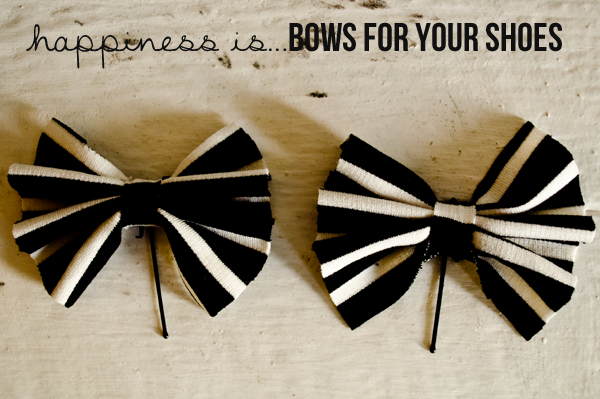
{Steps 8 & 9}: Tie your small strip of fabric around your larger piece of fabric. Cut off the excess fabric from your small strip of fabric. Your bow will be complete. Repeat these steps to make your other bow.
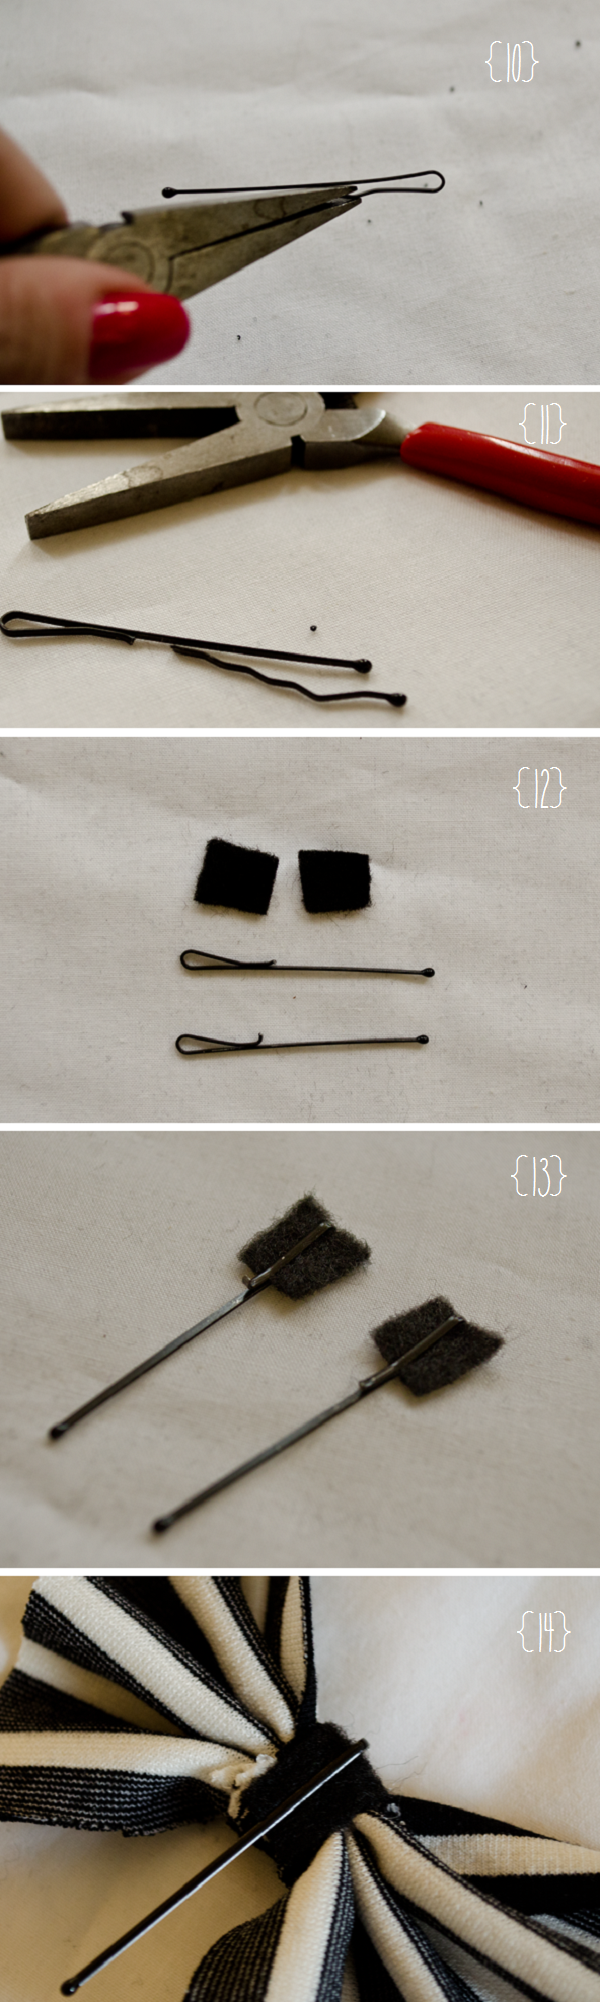
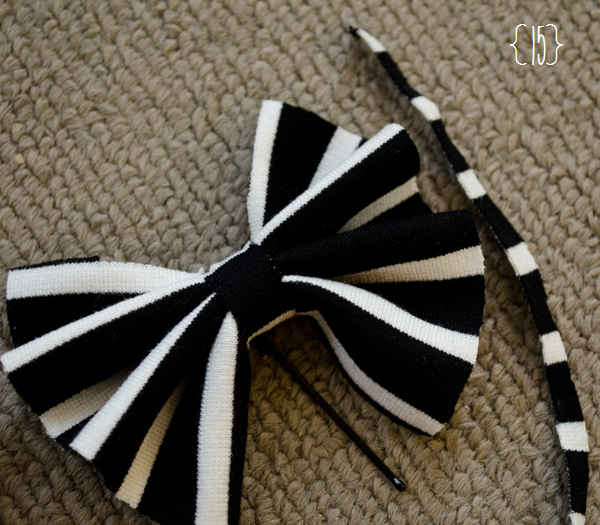
 {Steps 10 & 11}: Grab your bobby pins and pliers. Place your pliers on the first notch of your bobby pin. Bend the booby pin all the way back with your pliers, then bend it all of the way forward. This should snap your bobby pin. Repeat this with your other bobby pin.
{Step 12}: Cut 2 small rectangles from your felt. Use the knot of your bow to determine how long and wide to make these.
{Step 13}: Put your felt in between the two metal pieces of your bobby pin. Make sure the shortest part of your bobby pin is facing up. Use your hot glue gun to put glue on your felt.
{Step 14}: Stick the felt (glue side down) to the back of your bobby pin on the knot of your bow. Repeat these steps for your other bow.
 {Step 15}: I decided I wanted my bow a little smaller, so cut a little bit (a little less than a 1/4 inch) off of the sides of my bows. I just followed the curve of the bow when I was cutting.
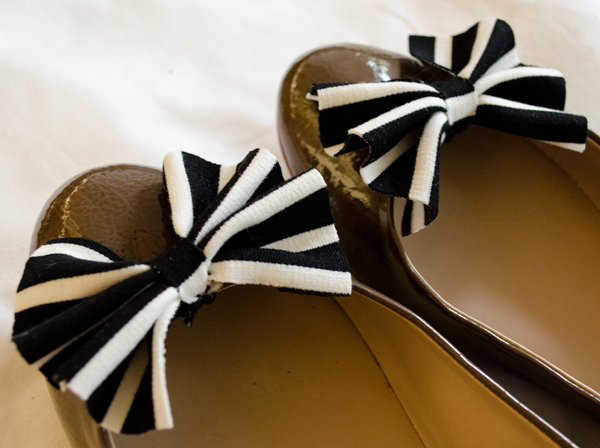
 Open up your bobby pins (you may need to open it up wide to stretch it a bit) and slide them on to your ballet flats!
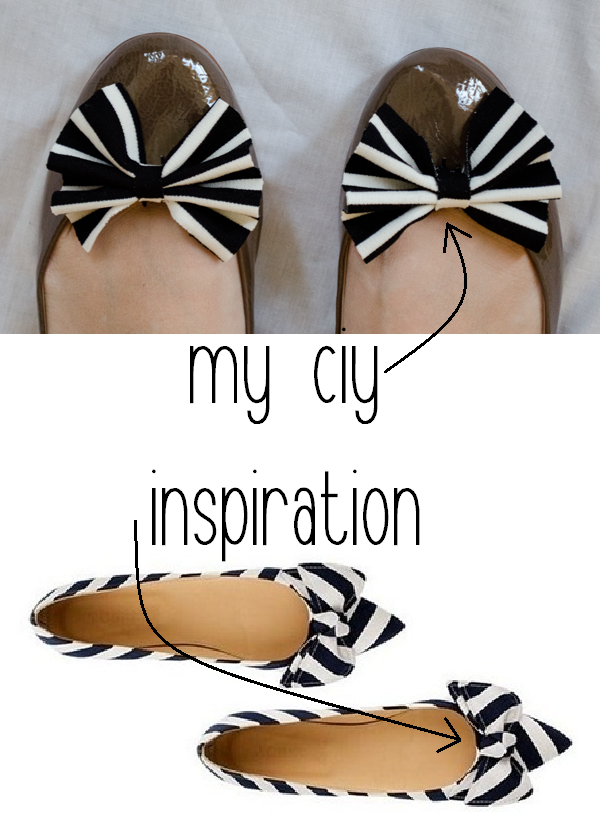 {Photo credit: Bottom – JCrew}


May 10, 2013 3:46 pm
These turned out so cute! I love that you made the bow removable.
Kristina does the Internets
May 10, 2013 3:51 pm
Thanks, Kristina. You can add them to all of the flats you own! :)