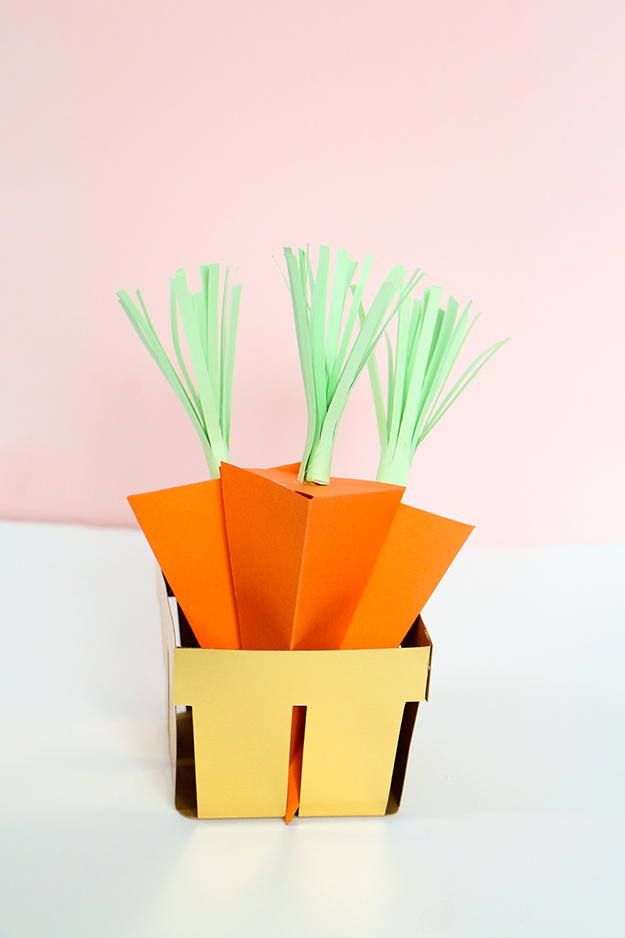
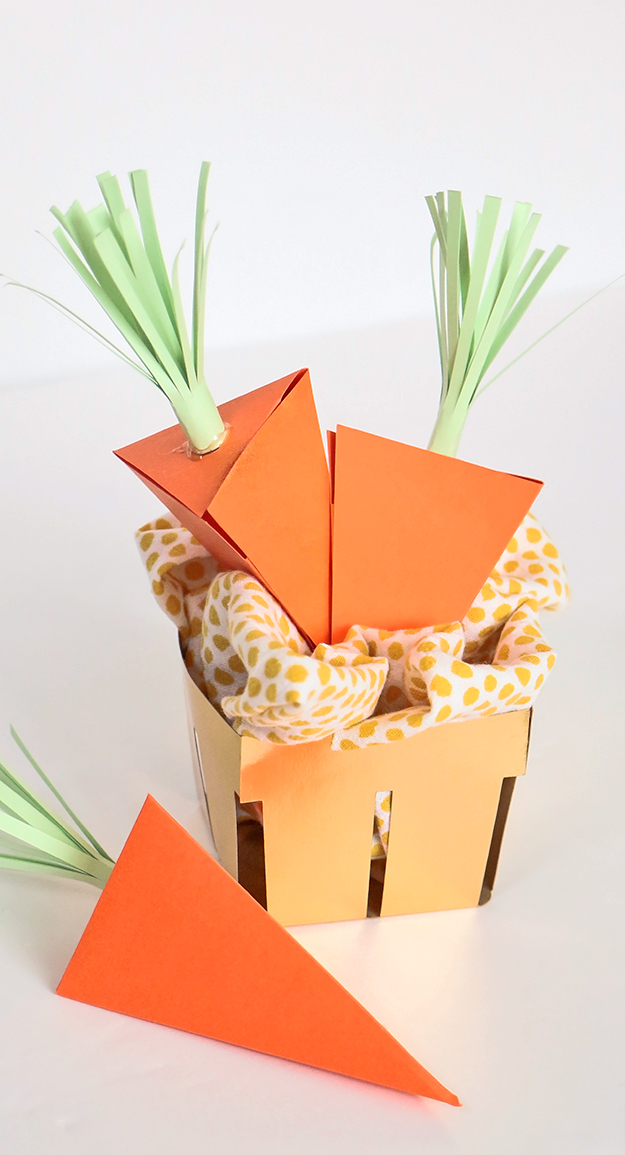
You guys, I’m super excited because I figured out how to create my very own template in the Cricut Design Space! Woo Hoo! I wanted to create some easy decorations for Easter and thought a carrot craft would be perfect. So, I embarked on a journey to create my very own carrot template! Now, I know this is a super basic design, but for me it feels like quite the accomplishment since I am new to the Cricut Design Space.
When I decided to try and create my own carrot template, I had to visualize how to make it 3-D. Obviously I knew an elongated triangle would be part of the design. I ended up attaching 3 triangles and added a small rectangle to use as the connector piece. Like I said, this design is super basic, but I’m impressed with myself for figuring it out from start to finish!

There are so many different ways you could use these 3-D carrots. You could add them to a basket and use them for festive decor, string them with some baker’s twine for a sweet holiday garland, or fill them up with candy and give as a favor. I’m pretty obsessed with these cheery little paper root vegetables, I hope you are too!
Here’s what you’ll need:
- Green and Orange Cardstock
- Carrot Template
- Cricut Explore Air 2
- Scissors
- Hot Glue Gun
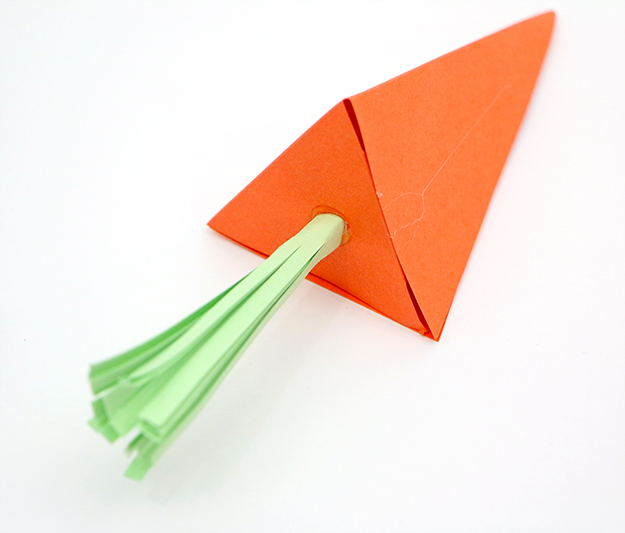
First, cut out a carrot using the template with either your Cricut machine or cut it by hand. Fold the carrot and glue it together. Then, cut a piece of green paper that’s 3.5 inches tall and 3 inches wide. Next, use your scissors to create fringe. Once you’ve added fringe to the entire strip of paper, add a dab of glue to the inside and begin rolling it to create the stem.
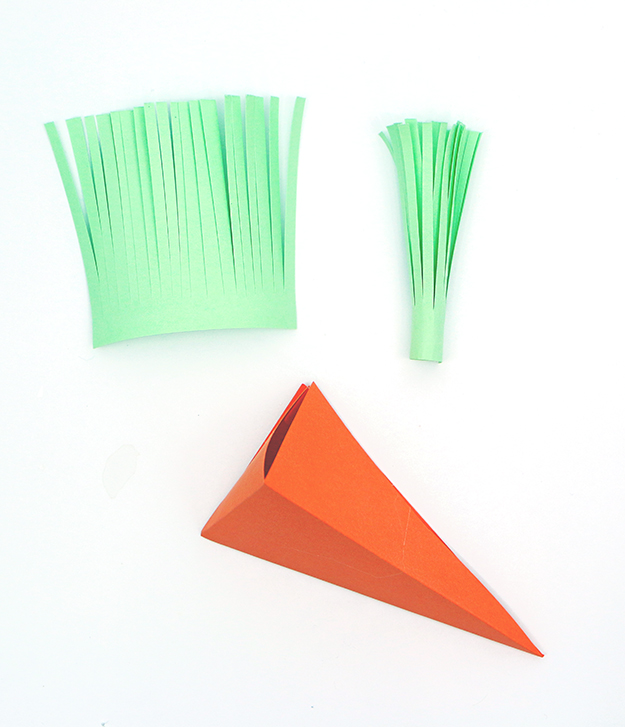
Add hot glue to the end of the stem and glue it to the top center of the carrot.
That’s all folks! How will you use your DIY 3-D carrots for Easter? Psst…the little gold paper basket below was also cut from my Cricut – It’s a free template!