Home

Dec 14, 2017 | Post by: Meghan No Comments

DIY Shadowbox Snowflake Shaker Artwork

I was feeling super inspired the other day when I was roaming the aisles at Michael’s when I spotted there clearance section.  I found 2 framed pieces of artwork that were on sale for just $1.00!   As I played around with them for a bit, I thought I could glue them together to create a shadowbox frame.  Now, shadowbox frames aren’t crazy expensive, but I figured if I could make one for $2 and turn it into a fun wintery scene I was down with it.

IMG_3735

There is something about a shadow box frame.  The depth and dimension make it way cooler than any regular frame. Am I right? I really wanted to turn my DIY shadowbox frame into a festive holiday decor piece so I grabbed some snowflake sequins to fill that baby up. (more…)

Nov 24, 2017 | Post by: Meghan No Comments

DIY Rhinestone Shoe Clips

When it comes to flats, I always seem to lean more towards simple shoes. I like to have shoes that can be worn with different outfits, maximizing the wear I get out of them. However, there are times when I wish I had a shoe that had more pizzazz.

IMG_9797

I was recently looking online at some higher end shoes and noticed there were some with pretty sparkly embellishments on them. (more…)

Nov 22, 2017 | Post by: Meghan 6 Comments

Trader Joe’s Bag Challenge: Project 3 – Paper Flowers

91.png

I am pretty much in love with everything from West Elm.  Their style and esthetic is modern yet chic. A few years ago I saw the below paper flowers.  Of course, I looked at the price tag and thought “Really, for paper??”.  So, I took inspiration from West Elm and created my version of their paper flowers.  These are a fun DIY to add to an empty vase you have that’s in need of some no maintenance flowers!  (more…)

Nov 20, 2017 | Post by: Meghan No Comments

DIY No-Sew Apron

Staying clean while cooking is so much easier when you can toss on this cute and functional no-sew tea towel apron!

When it comes to cooking I always make a huge mess.  Even when I try my hardest to be clean and neat as I mix and beat, I always seem to fail. I’ve even started changing my clothes when I cook because I know myself Echtgeld Casino : Besten 18 Echtgeld Casinos für deutsche Spieler, and I know I’ll get whatever I’m making on my clothing!

Changing into my “cooking clothes” was starting to become a pain; I didn’t want to change my clothes just to make some brownies! It was time to protect the clothes I was wearing, so I made a functional and cute apron out of a tea towel. What’s great about this project is it doesn’t require any sewing.  This DIY apron is perfect if you are hosting Thanksgiving this year.  It would also make a great hostess gift!  See how the full tutorial on diys.com.

Nov 15, 2017 | Post by: Meghan No Comments

DIY Pumpkin Placecards

These mini DIY pumpkin placecards are just what you need for your Thanksgiving tablescape! Entertaining during Thanksgiving can be a stressful time. There’s the meal planning, housecleaning, and the decorating for the big day. We want everything to be perfect and special so the day is memorable while spend time with friends and family. Adding special touches to the decor can create an environment that your guests will remember.

If you don’t have a lot of time to create an elaborate centerpiece for your Thanksgiving table, all you need are these mini DIY pumpkin place cards that are the perfect touch.  They create dimension and give your guests something to take home when the evening is Casino Bonus over.  Since these mini pumpkin placecards are simple to make, you won’t need to spend a lot of time creating them. You can whip them up quickly and check them off your long to do list!  Head on over to diys.com to see the full tutorial!

Nov 13, 2017 | Post by: Meghan No Comments

Simple DIY Fabric Pumpkins

Transition from Halloween to Thanksgiving with these cute and simple DIY fabric pumpkins!


Now that I am actually making an effort to decorate my house for the holidays, I was pretty excited about the transition to more generic Fall/Thanksgiving decor.  I’ve decided to treat my two shelves in my living room as my holiday focal points for my decorating.  They are perfect because they are out of reach of Tommy and Evie—I don’t have to worry about them getting their little hands on items they shouldn’t be touching!
 
I’ve been seeing fabric pumpkins circulating since the end of Summer (insane, right?!) I saw my first fabric pumpkin at a cute art fair back in August and thought it looked super easy to make.  So, I added it to the list of projects I wanted to try.  I went to Joann’s and grabbed some cute Fall fabric for my pumpkins.  As I started making these little guys, I wanted the process to be as simple as possible.  So, Instead of sewing the top of my pumpkins, I cut slits at the top and tied a knot!  The entire pumpkin making process took about 30 minutes.  If you want to se just how easy these cute pumpkins are to make, head on over to diys.com for the full tutorial!
Nov 04, 2017 | Post by: Meghan 2 Comments

A Fall Wreath Alternative

_DSC0144_edited-1

A few years ago, my mother-in-law gave me some birchwood printed paper. I guess at one point I had told her she could get the look of a birchwood frame by buying birchwood printed paper and adding it to a frame as opposed to actually buying the real deal. I must have had a few glasses of wine because I do not remember this convo at all! Either way, she ended up not using the paper and gave it to me to use it for a project. I’ve had this paper forever and finally decided to use it!

I knew I wanted to add a Fall wreath to my front door. Now, I wasn’t really feeling a traditional wreath; I wanted something different. I came up with an idea using a large pinwheel, a berry wreath, and a small pinwheel. At first, I was going to use a small stick wreath I had bought at Joann’s, but as I got into my project I decided Click here to continue reading…

Oct 31, 2017 | Post by: Meghan No Comments

DIY Bat Candle Holder

I have one more fun Halloween project for the season (nothing like waiting until the last minute to post this!).  This DIY bat candle holder is a fun twist on lighting up your mantle, shelf, or walkway this Halloween.  It’s also the perfect project for glass jar hoarders and those that love a good upcycle!

IMG_3360

My kids had finished yet another jar of peanut butter from Trader Joe’s I was rinsing it out so I could put in in the recycling pile when I noticed what a nice jar it was.  You guys, it was smooth with no weird decorative swirls or odd seams – it was such a nice simple jar!  I know this might sound weird, but I think it’s hard to find a glass jar that has a simple style.  Since I was clearly in love with this jar, I wanted to try and use it for a project.

I grabbed some extra adhesive vinyl I had and cut out small bats.  Now, it you have a Cricut or Silhouette, bravo to you because you can literally finish this project in like 10 minutes.  If you are like me and do not have one find a bat template from the good old internet, print out the image, trace it on top of your vinyl, and cut it out.

batcandleholderIMG_3025

Once you have all of your bats cut, arrange them on your jar.  Then, hit the jar with black matte spray paint and let dry.  You’ll want to do two coats of paint.  After your paint has dried, slowly peel off the vinyl bats – you may need to use tweezers to get them off.  That’s it!  For extra detail, I wrapped the top of my jar with raffia.  Plop in a battery operated candle or a real one for a super cool and bat candle holder!

IMG_3028IMG_3372

You can see the spooky bats shining through!

IMG_3366

Oct 27, 2017 | Post by: Meghan No Comments

DIY Mini Felt Pumpkin Tote

This DIY mini felt pumpkin tote is just what your little tot needs to store all of their coveted candy on Halloween!

I am a huge fan of Fall.  I love when the seasons change, especially when we go from Summer to Fall.  This transition brings cooler temperatures and beautiful foliage.  Fall also brings Halloween, which is one of my favorite holidays! I love crafting up projects for this spooky holiday.

HICFeltPumpkinTote

Since this is the first year Tommy and Evie are able to actively participate in Halloween, I wanted to make them a cute mini felt pumpkin tote.  Let’s be real, they don’t need a huge tote for trick-or-treating since they’ll probably lose interest in the activity after 5 minutes. So, this mini tote is the perfect size for their little hands to hold and carry around.  See the full tutorial on DIYs.com!

HICFeltPumpkinTote2

Oct 26, 2017 | Post by: Meghan 2 Comments

DIY Skunk Costumes

Halloween has always been a time for crafting.  Every year my mom would make costumes for my brother and I since she was about to drop cash on flimsy plastic costumes that we were going to use for just one night. She would take time to make us a costume usually made out of felt and 100% amazing!

IMG_3132X

As I’ve gotten older I too have made all of my Halloween costumes.  I was really into coming up with unique creations in college.  While other girls were basically wearing a bra and underwear along with a hat and handcuffs for their police officer costumes, I was busy painting my face gray and adding stuffing to a gray sweatshirt for my manatee costume.  I mean, Halloween is typically cool – the more clothes the better, right?

IMG_3095.jpg

Now that I have kids I knew I wanted to continue the DIY costume tradition.  I was super busy last year working full-time and running around like a maniac taking care of  Tommy and Evie that I just didn’t have the time to make their Halloween costumes.  So, I enlisted my mom’s help to create adorable little crayon costumes for them since she had made the same costume for my brother and I like 30+ years ago!  Man, they turned out so cute.

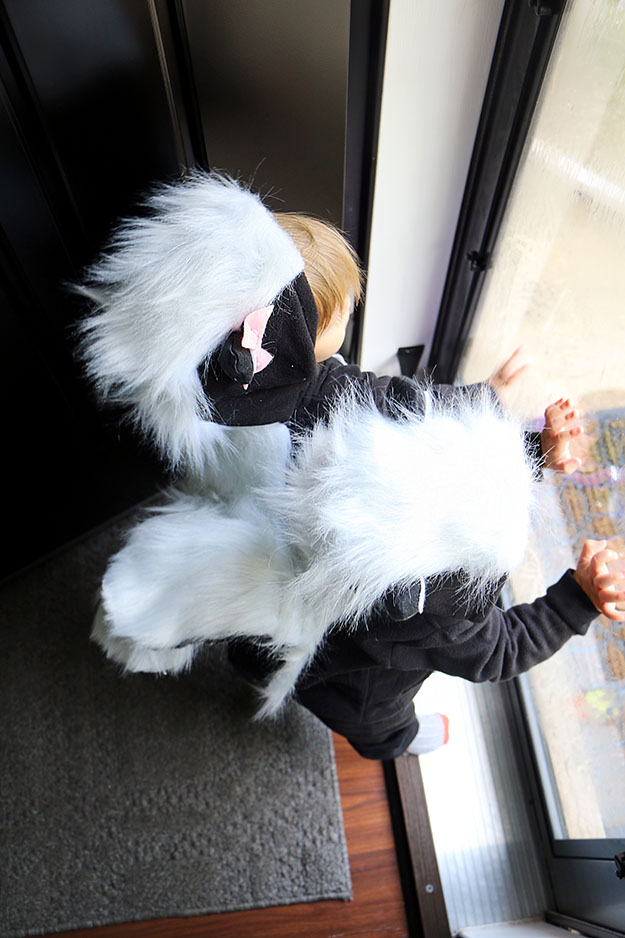
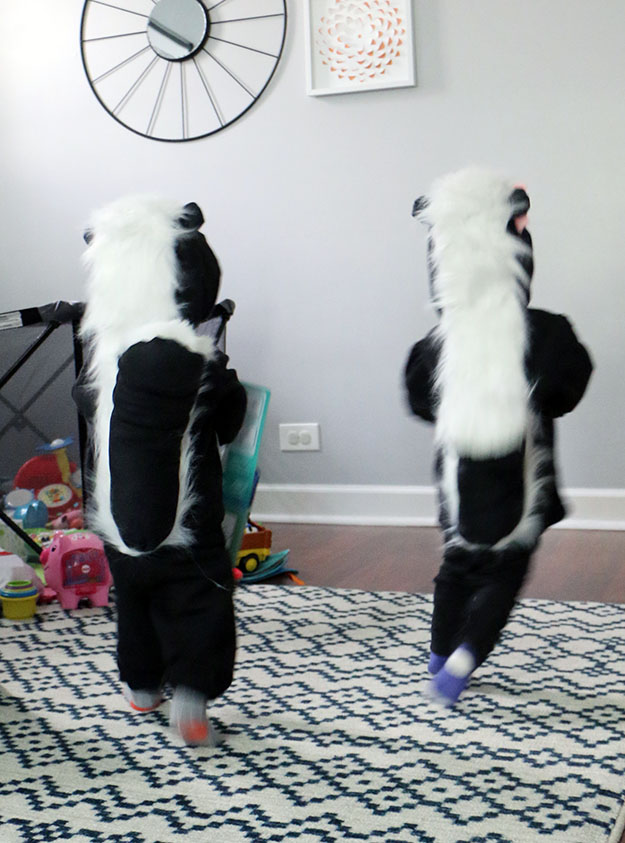
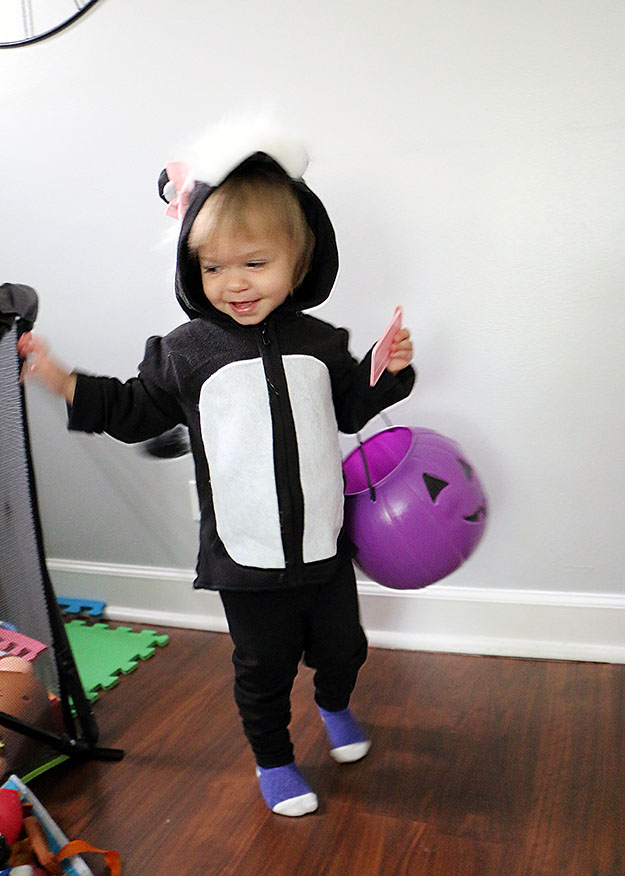
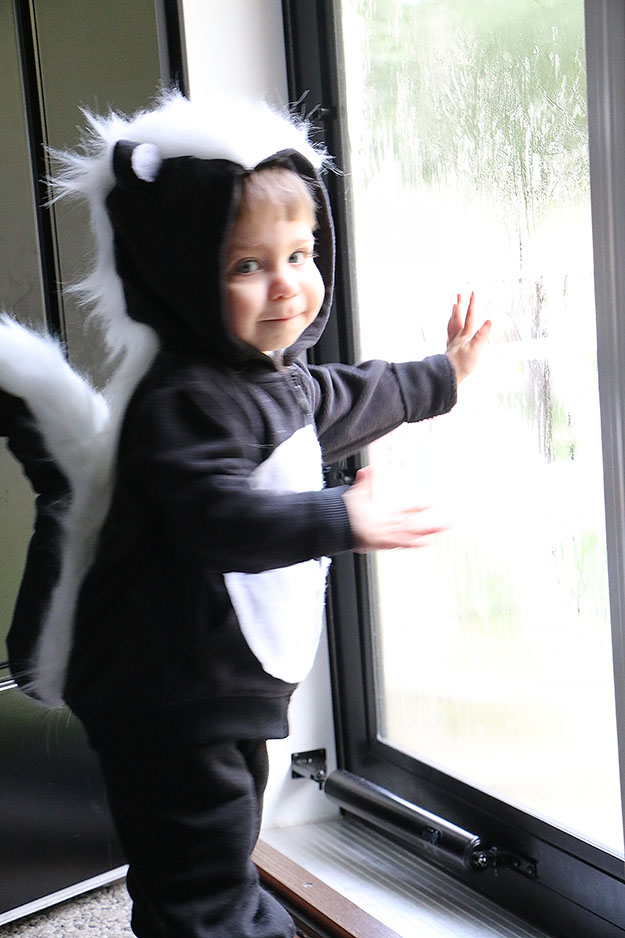
My life has calmed down a bit since last year now that my kids are older and I’m not working full-time.  So, I decided to get a head start on their costumes.  I was going to go the fruit route and make Evie a pineapple since I have a slight obsession with pineapples and Tommy a kiwi.  I ended up going in a different direction.  I had remember my mother-in-law showing me 6 month old twins dressed up as skunks.  At that age they looked more skunk-like since they were crawling, but I figured walking skunks would be just as cute! I found a skunk costume on Pottery Barn Kids for $59.99.  Umm…No!  I can’t image paying $120 for 2 Halloween costumes – INSANE!!!  I used the Pottery Barn version as my inspiration and was able to make my own version of the skunk costume for about $15.00 each.  Thank goodness for faux fur and hot glue guns!

Check out my full tutorial below! ***Sorry for all of the blurry pictures-my skunks are very active!***

Supplies:

  • Black hooded sweatershirt
  • Black leggings
  • 2 Sheets of White Felt
  • 1/4 Yard Black Fleece
  • Hot Glue Gun and Glue
  • Thick Floral Wire
  • Poly-Fil
  • Pink and White Polka Dot Felt (optional – this is for a girl skunk :D)
  • White Faux Fur Trim
  • Scissors
  • Black Thread
  • Needle

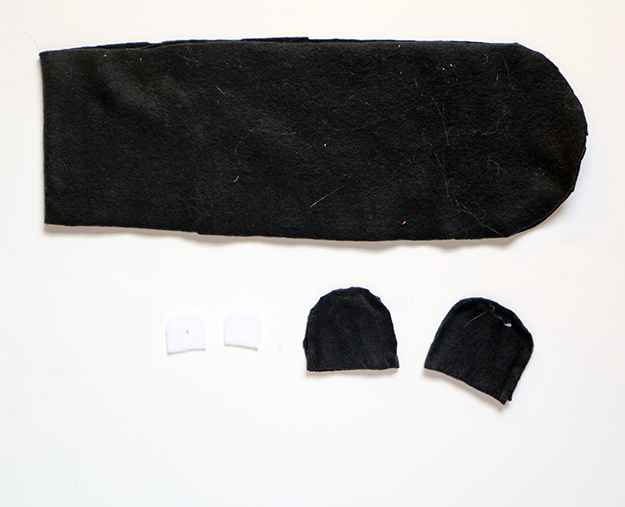
1. Cut a tail out of your fleece.  Make the tail about 4 inches wide and the length from the top of your sweatshirt to the bottom.  Round the end. Cut two tails.  You’ll also cut out two ears (four pieces total – 2 pieces for each ear). Cut two pieces of white felt with the same shape but smaller so they will fit inside of your ears.

DIY Skunk Costume

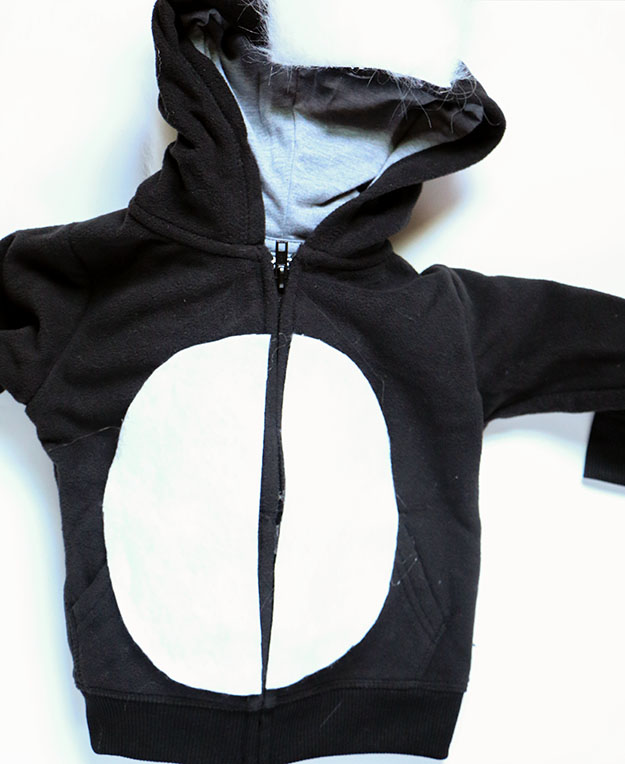
2. Add fur to your sweatshirt.  My fur came in a large square. So, I cut it in half which was the perfect size. **NOTE** Make sure your fur is going down. Also make sure when you add another piece of fur it’s going in the same direction.  Add hot glue to the end of your fur and start by adding it to the front of your hood.  You’ll keep adding glue, working your way to the back of the hood.  You’ll then take another piece of trim (if yours is not long enough) and glue it so it is up against your last piece.  The fur from the first piece should cover the seam.

DIY Skunk Costume

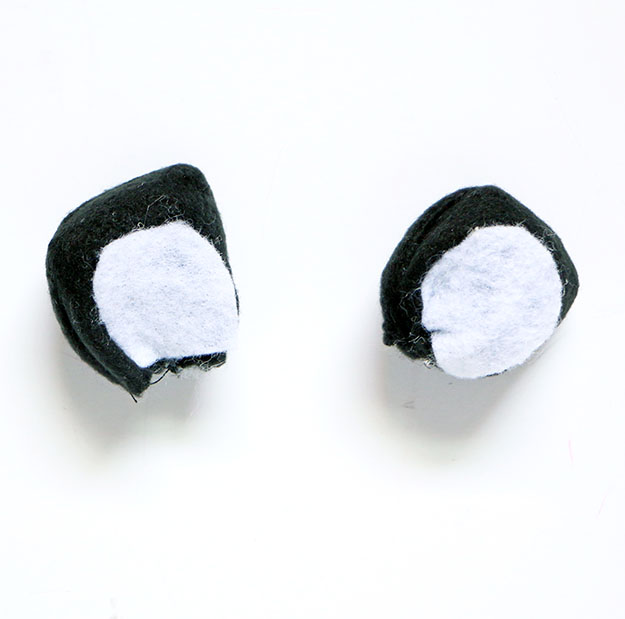
3. Add glue to the outer edge of your ears to glue them together. Flip them so the seam is on the inside.  Next, glue the white pieces of felt to the both ears. Then, fill each ear with Poly-Fil and sew the bottom together.

DIY Skunk Costume

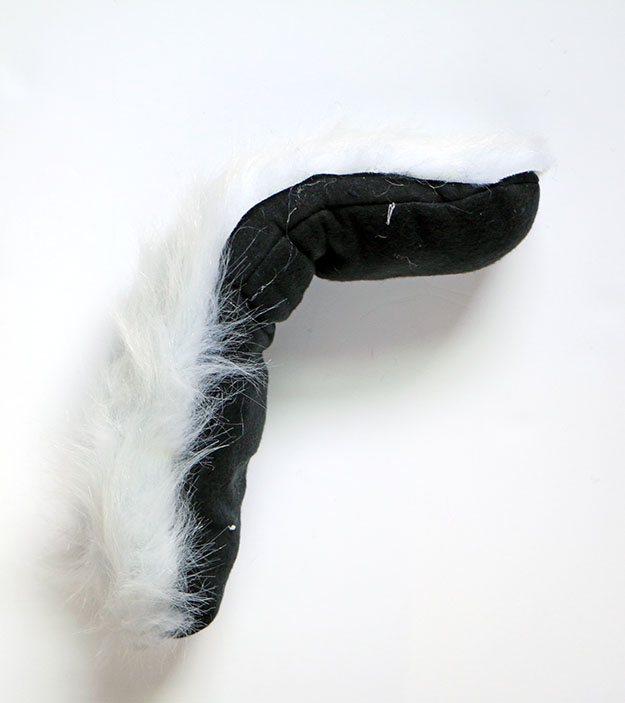
4. Sew (or glue) your two tail pieces together, leaving the bottom (non-curved side) open.  Turn the tail right side out and glue your fur trim to the top.  Trim the fur at the end of the tail so it’s rounded. Next, add Poly-Fil.  Cut a piece of floral wire the length of the tail and insert it inside.  Finally, sew the bottom of the tail shut.

DIY Skunk Costume

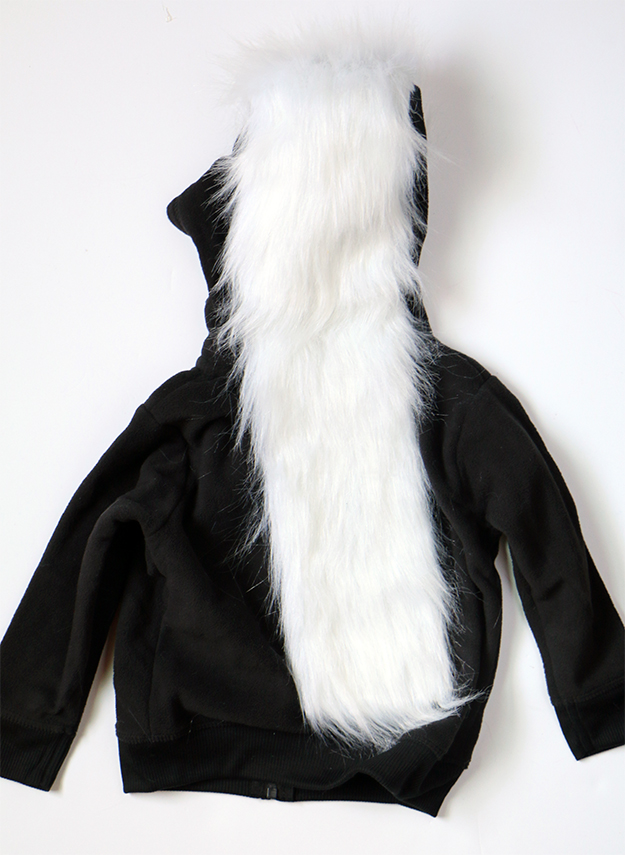
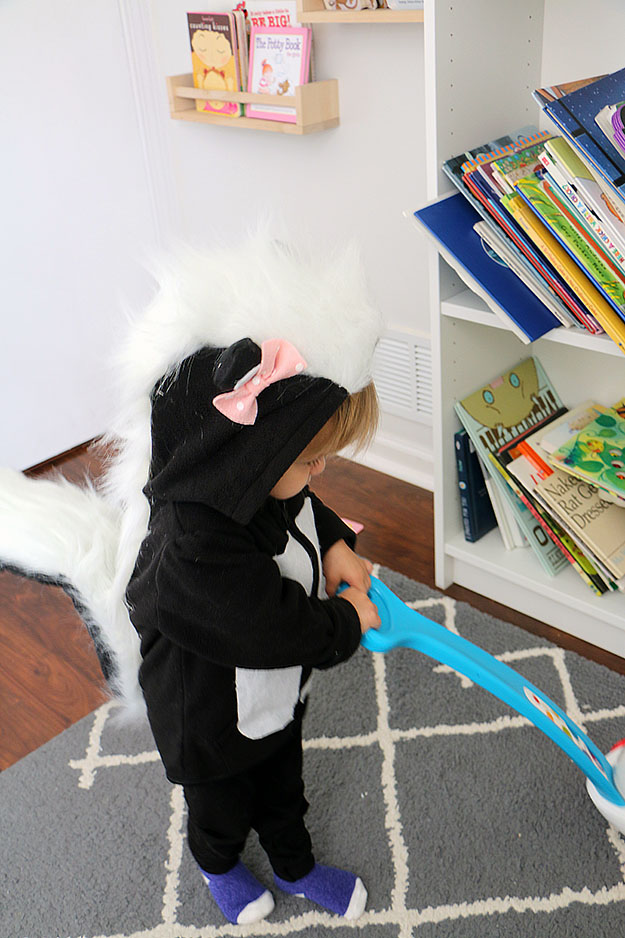
5. Glue the tail to the back of the sweatshirt. You will start at the bottom adding glue and work your way up about half way.  Add glue to the bottom of your ears and secure them to the middle of the hood with one one each side of the fur trim. If you want a bow, make one out of the pink felt and glue it to one of the ears.

DIY Skunk Costume

6. Cut a large oval out of your white felt.  Cut the oval in half and glue one half on each side of the zipper.

DIY Skunk Costume

DONE!  Just pair the hoodie with a pair of black pants and add a black dot to your child’s nose and they are all set to be skunky!!!

IMG_3139

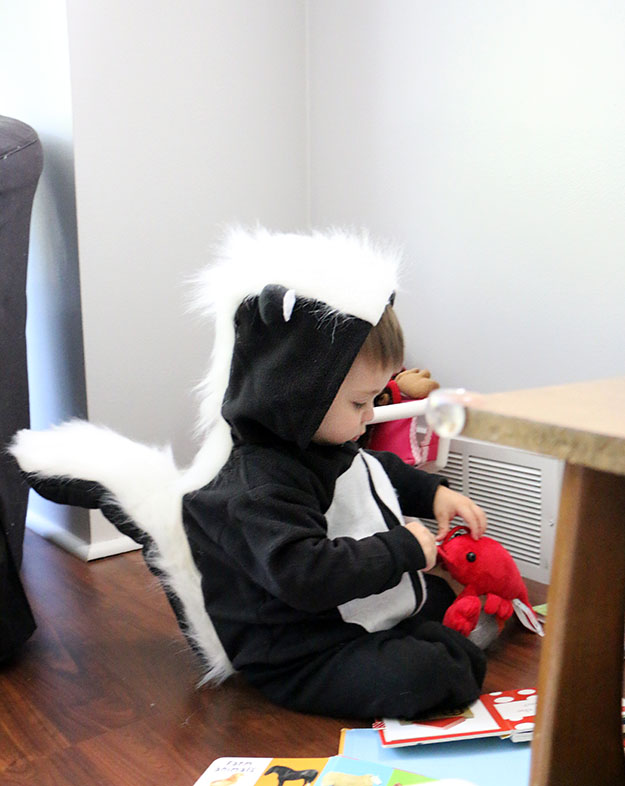
I am super happy with how my little DIY  skunk costume turned out.  I think my version is a great alternative to my inspiration from Pottery Barn Kids.  So, if your running out of time to make your kiddos a costume for Halloween, this DIY skunk costume is perfect.  Gran your trusty glue gun, a glass of wine and get crafting!

IMG_3096IMG_3084.jpgIMG_3164

  • Follow on Bloglovin
  • Categories

  • Archives

  • Press

  • Recent Pins

    Met Gala 2024 Arrivals: See Every Look from the Red Carpet [PHOTOS]...
    Esquites (Mexican Street Corn Salad) Recipe on Food52...
    ...
    Video player poster image...
    Black Bean and Corn Salad - Delish.com...
    Queso Fundido - Delish.com...
    ...
    Chocolate Chickpea Brownies are a healthy alternative to regular brownies and are fudgy, chocolatey, and easy to make. They are made gluten free, dairy free and vegan....
    ...
    Healthy Turkey Meatballs in Tomato Sauce | Ambitious Kitchen...
    ...
    An easy Cinco de Mayo Fiesta from @sweetphi...
    DIY Flower Crown : Flower Girl & First Communion - YouTube...
    ...
    ...